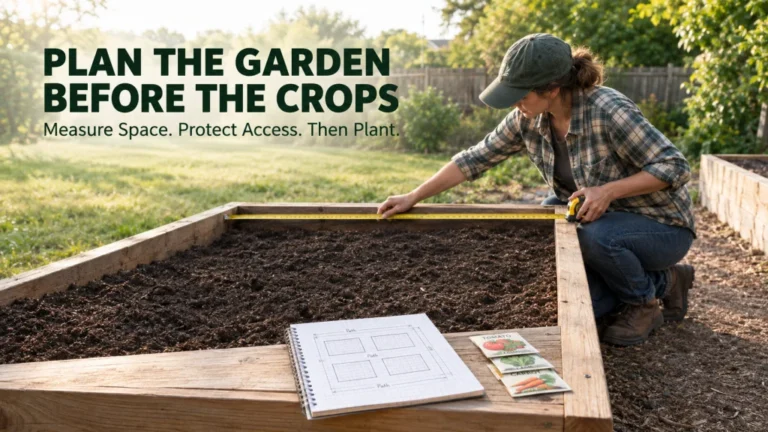
A useful garden plan starts with measurements, fixed reference points, and a base map that reflects the space you actually have. The goal is not artistic perfection, but a dependable drawing that shows boundaries, buildings, trees, paths, and other features before planting ideas are added. Irregular edges can be handled with repeatable measurements, while a consistent scale keeps the drawing usable when you compare beds, paths, and spacing. Keep proposed changes on a separate overlay so the measured base stays intact as your ideas change.
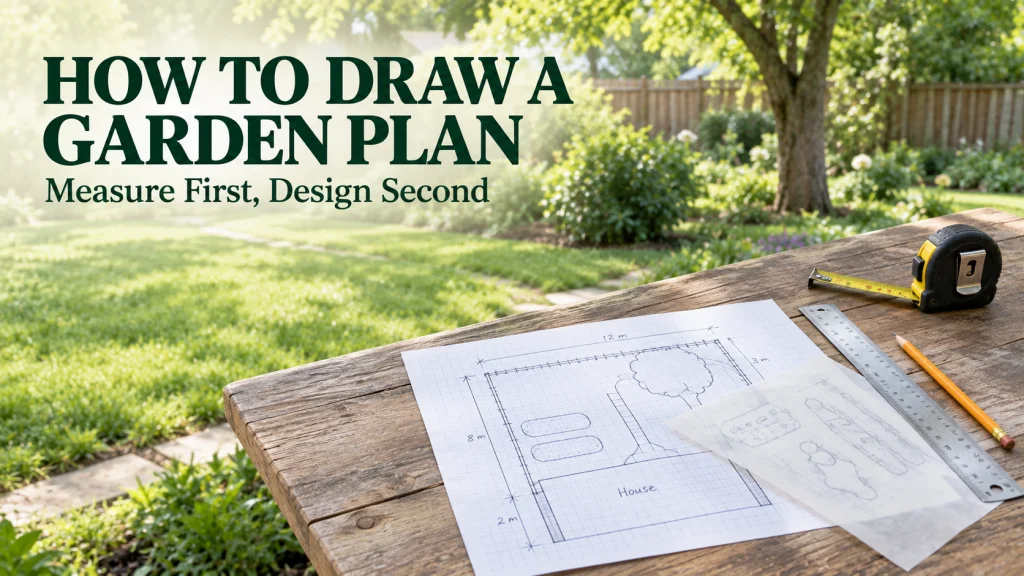
A pretty sketch and a usable map are not the same thing
If you are learning how to draw a garden plan, start by separating appearance from usefulness. A sketch can look polished and still fail the moment you try to place a bed beside a fence that was never measured, work around a tree that sits several feet from where you guessed, or preserve a path that is narrower than it looked from the patio. A plain pencil map with dependable dimensions is more useful because it gives later planting decisions a physical frame. The drawing does not need to impress anyone; it needs to help you make changes without repeatedly discovering that the garden is shaped differently from your memory.
The most useful workflow is to record fixed reality first and design second. Measure the space, plot what cannot easily move, choose a scale that fits the page, and only then begin adding possible beds or plant positions. That sequence is also a good fit with broader garden planning decisions, because layout ideas become much easier to compare when the base dimensions are stable. If you are still deciding how the site fits into the larger setup of a new garden, the starting a garden process gives that wider context without turning this drawing task into a complete site design exercise.

These 30 wood-cased pencils come pre-sharpened with #2 HB medium-soft lead and attached erasers. They are intended for writing, drawing, and sketching. A pencil-and-eraser setup makes it easy to draft a measured garden base map and correct transferred lines before committing to ink.
Check On AmazonIf you click this link and buy, we earn a commission at no additional cost to you.
Decide what the base plan must answer
A base plan should answer a short set of physical questions before it tries to answer any planting question. Where are the boundaries, where does the house or other building sit, which doors and gates affect access, and which fixed objects already occupy space? It should also show features such as mature trees, established paths, fences, sheds, utility covers that are visible at the surface, and other objects that would change where a bed can reasonably go. These are the facts that proposed layouts have to work around, so they belong on the durable base rather than on a temporary idea layer.
Do not ask the drawing to prove things it cannot prove. A measured sketch does not establish a legal property line, confirm where buried utilities are located, or tell you whether a particular patch of ground drains well after heavy rain. It also does not tell you whether a plant will thrive just because its circle fits on paper. The plan is a spatial tool, not a substitute for site observation, soil assessment, or official boundary and utility information, and that boundary keeps a simple homeowner map useful without pretending it is a construction or surveying document.
Make a rough field sketch before measuring
Start outside with a loose sketch that gives every measurement somewhere to live. Draw the house edge, fence lines, corners, trees, paths, gates, and obvious fixed objects in roughly the right relationship, but do not worry about scale yet. Label corners and useful reference points with simple letters so you can tell which measurement belongs to which location when you transfer the information later. A messy field sheet with clear labels is far better than a neat page full of numbers that no longer have an obvious destination.
Record each dimension directly beside the line or object it describes, and use the same units throughout the field notes. Include widths that affect movement, such as a gate or narrow passage, when those widths will matter to the eventual garden layout. If an object is large enough to influence planting space, measure its footprint or the part of it that matters rather than representing it as a vague dot. This rough sketch is your measurement ledger, so its job is to preserve relationships and reduce memory errors before you begin the cleaner scale drawing.
- Label repeatable fixed points before taking diagonal measurements.
- Write measurements next to the feature they belong to instead of in a separate unlabeled list.
- Note openings, corners, and fixed obstacles that affect access or planting space.
- Use one measurement system consistently until the base map is complete.
| Sequence | What to do | What you should have before moving on |
|---|---|---|
| 1. Rough sketch | Draw the main boundaries and fixed features in approximate relation to one another. | A field sheet with a clear place for each measurement. |
| 2. Label reference points | Name building corners, fence corners, gates, tree locations, and other repeatable points. | Targets that can be identified again if a measurement needs checking. |
| 3. Record measurements | Add boundary lengths, widths, diagonals, offsets, and object dimensions beside the features they describe. | Numbers tied to specific lines and points rather than a separate unlabeled list. |
| 4. Check the field sheet | Resolve unclear labels and retake doubtful measurements before leaving the site. | A sketch that can be understood without relying on memory. |
| 5. Transfer at one scale | Choose a scale that fits the page and convert every measured line consistently. | A clean base map with the same physical relationships as the field sketch. |
Once the field sketch is complete, read it as if someone else had made it. If you cannot tell which two points a number connects, fix that before leaving the space. Mark any dimension that needs to be retaken instead of guessing what you probably meant. The sequence above keeps the rough sketch, measurements, and scale transfer connected, so the clean drawing is built from recorded information rather than memory.

This 12-pack contains college-ruled composition notebooks with 100 sheets each. Each notebook measures 9.75 by 7.5 inches and has a black marble cover with conversion charts. The ruled pages give field measurements, point labels, and retake notes a consistent place before the clean scale drawing is made.
Check On AmazonIf you click this link and buy, we earn a commission at no additional cost to you.
Measure boundaries from repeatable fixed points
Known fixed points make a measured plan much more dependable than a chain of guesses from one feature to the next. A straight section of a building can provide two useful references, such as points A and B, because the distance between them can be measured and then reused. To locate a third point, such as a fence corner or tree trunk center, measure from A to that point and from B to that same point. Those two distances constrain where the third point belongs when you transfer the measurements to paper, which is the basic logic behind triangulation.
The important word is repeatable. A reference point should be something you can identify again, not a temporary object, a patch of lawn, or a guessed spot along a curved edge. For a tree, decide whether you are locating the trunk center, trunk edge, or another clearly defined point and stay consistent so the drawing does not quietly mix different measurement targets. The same principle applies to sheds, corners, posts, and path intersections: define the point first, then measure to it, because precision in the numbers cannot rescue an undefined target.
Handle irregular edges without pretending the yard is a rectangle
Real yards often have bowed fences, angled corners, curved beds, and boundaries that do not sit square to the house. For distinct corners, measurements from two fixed reference points can place each corner without forcing the whole yard into a rectangle. For a curved edge, a practical homeowner method is to establish a straight baseline and measure perpendicular offsets from that line to the curve at regular positions. Plotting those offset points gives you a series that can be connected into a reasonable representation of the edge.
Choose the spacing between offset measurements according to how much the edge changes. A broad, gentle curve can usually be represented with fewer points than an edge that bends sharply or changes direction several times. The goal is not to manufacture false precision, but to capture enough shape that beds, paths, and fixed features can be placed without obvious conflicts. If an awkward boundary is also a legal property boundary, treat your garden drawing only as a planning aid and rely on appropriate official information when the exact boundary itself matters.
| Boundary shape | Measurement approach | Record on the field sketch |
|---|---|---|
| Distinct angled corner | Measure the corner from two repeatable fixed reference points. | Both reference points, both distances, and the corner label. |
| Broad curved edge | Use a straight baseline and take perpendicular offsets to the curve. | Baseline positions and the matching offset distance at each position. |
| Curve with sharper changes | Use the same offset method but take points closer together where the shape changes faster. | Extra offset points around the tighter bends instead of forcing one smooth guess. |
Use the method that matches the shape you actually see rather than forcing every edge into the same measuring pattern. Two fixed-point distances work well for a distinct corner, while offsets are easier to manage when an edge changes gradually along a baseline. Record enough information that each plotted point can be traced back to the field sheet. If the measurements still leave the shape ambiguous, take another measurement instead of smoothing the line by eye.
Choose a scale that fits the page and stays readable
To draw a garden plan to scale, choose one conversion and use it for every measured line on the base map. The scale has to fit the longest garden dimension on the usable paper while leaving enough room to read gates, paths, beds, and other details. For example, if a 40 foot length must fit within 10 inches of drawing space, a scale of one quarter inch per foot fits that dimension exactly. A smaller scale puts more garden on the page, while a larger scale makes details easier to see, so the best choice depends on both site size and the amount of detail you need.
Write the scale on the drawing and do not switch conversions midway through the plan. Graph paper can make repeated distances easier to plot, but plain paper with a ruler also works when the conversion is consistent. Check one or two completed lines against your field measurements before you continue, because a mistaken conversion repeated across the whole page creates a very neat but unusable map. If the site is too large for a readable single sheet, it is better to use a smaller scale or separate detail sheets than to squeeze features until they become hard to interpret.
| Scale choice | What it changes on the page | When it helps |
|---|---|---|
| Larger drawing scale | Features take more paper space | Small gardens or areas where gates, beds, and paths need clear detail |
| Smaller drawing scale | More of the property fits on one sheet | Larger gardens where overall relationships matter more than fine detail |
| Separate detail sheet | Keeps the base map readable while enlarging one area | Complex corners, tight side yards, or dense existing features |
A scale is useful only when it serves the decisions you plan to make from the drawing. Pick the simplest conversion that keeps the whole map legible, then stay with it consistently. Write that conversion on the sheet where it remains visible while you work. If a later detail needs more room, enlarge that area on a separate sheet rather than quietly changing the base scale.

This 9-inch torpedo level combines a metric and imperial ruler with three vials for horizontal, vertical, and 45-degree checks. Its ABS and aluminum frame has a magnetic edge for use on steel surfaces. For a paper garden plan, the integrated ruler provides a straightedge for transferring one chosen scale consistently.
Check On AmazonIf you click this link and buy, we earn a commission at no additional cost to you.
Plot buildings, trees, fences, paths, and other fixed objects
Transfer the most stable elements first because they create the frame for everything else. Start with the building edge or another strong baseline, then plot boundary corners, fences, gates, sheds, established paths, and mature trees from your measurements. Show an object with enough shape to reflect the space it occupies instead of reducing every feature to a symbol that hides its footprint. A wide trunk, broad paved area, or offset shed wall can change where a proposed bed fits even when the object looks small in a rough sketch.
Use the same reference logic you used outside rather than moving objects until the page looks balanced. When a feature was located from two fixed points, reconstruct its position from those measurements instead of eyeballing the final placement. If you discover that the measured relationships do not close cleanly, go back to the field notes and identify the conflict before building planting ideas on top of it. A good base plan can be visually plain, but its fixed features should agree with the measurements closely enough that later decisions about movement, bed size, and spacing are grounded in the real site.
Mark north and reference points for later site observations
Add a north arrow once the base geometry is stable so later observations have a consistent orientation. North does not tell you exactly how many hours of direct sun a bed receives, but it helps you record where observations were made and compare different parts of the garden without turning the page around mentally. Keep the fixed reference points visible as well, especially if you expect to add measurements or revise part of the map later. A plan becomes more useful over time when new notes can be tied back to locations that already have clear names and positions.
Treat orientation as context, not a shortcut for light assessment. Buildings, fences, trees, seasonal canopy, and neighboring structures can all change actual sun patterns, so a north arrow cannot replace observations of the site itself. If site selection is still unsettled, use the drawing alongside a more focused look at choosing a garden site rather than assuming orientation alone settles the question. The map gives you a stable place to record those observations, which is exactly why it helps to separate physical layout from conclusions about growing conditions.

This compass combines a directional compass with an easy-open metal carabiner clip. Its face includes luminous directional markers and a white index line for bearing alignment. It gives a simple reference for establishing north before adding orientation and later site observations to the garden plan.
Check On AmazonIf you click this link and buy, we earn a commission at no additional cost to you.
Keep sunlight and planting ideas on separate overlays
Once the measured base plan is stable, protect it from constant redesign by keeping changeable information on separate layers. Tracing paper works well for hand drawing because you can test a new bed, path adjustment, or planting arrangement without erasing the fixed map underneath. A digital drawing can use the same logic by keeping the base geometry on one locked layer and proposed changes on another. The tool matters less than the separation between what exists and what you are considering.
Sunlight notes also benefit from their own overlay because they are observations, not fixed geometry. You can mark sunny, partly shaded, or consistently shaded areas based on what you actually observe, then revise those notes as seasonal conditions or canopy change. Do not bake uncertain light assumptions into the same lines that represent the fence and house, because later corrections become harder to follow. Keeping measured facts, site observations, and proposed changes visually separate makes the plan easier to update and makes it obvious which information still needs verification.
| Layer | Put this information here | Why keep it separate |
|---|---|---|
| Measured base | Boundaries, buildings, fences, gates, paths, mature trees, fixed structures | These features anchor the plan and should not move every time an idea changes |
| Observation overlay | Sun patterns, wet spots, access notes, recurring problem areas | These notes may change as conditions are observed more carefully |
| Design overlay | Proposed beds, plant groups, path changes, movable features | Ideas can be revised without redrawing fixed reality |
The practical payoff is easier revision. A new bed idea can be compared with the same measured footprint, while a sunlight note can be updated without changing the fence, house, or path geometry. That also makes disagreements on the page easier to diagnose because you can see whether the problem comes from a measurement, an observation, or a proposed layout. Keep the layers distinct enough that you always know which kind of information you are editing.

This five-count set includes assorted-color chisel-tip highlighters. The bright fluorescent ink is described as smudge resistant. Using separate colors for sunlight observations and proposed planting changes can make different garden-plan overlays easier to distinguish without changing the measured base.
Check On AmazonIf you click this link and buy, we earn a commission at no additional cost to you.
Add beds and plant positions only after the base plan is stable
Proposed planting areas belong after the physical map, not before it. Once boundaries, access points, paths, buildings, and fixed objects are in place, you can see how much usable room actually remains and whether a bed shape interferes with movement or existing features. Draw proposed beds on the changeable layer and give them dimensions instead of relying only on attractive curves. That makes it much easier to compare an idea on paper with the space you will eventually mark outdoors.
Plant positions should also follow real spacing needs rather than decorative dots. The plan can help you test whether mature spacing fits within a bed, but the correct spacing depends on the plants you choose, so use appropriate plant guidance rather than inventing distances from the drawing. When you reach that stage, a focused guide to plant spacing in the garden is more useful than trying to make this base-map article do two jobs at once. The map supplies the available dimensions; plant-specific information determines how those dimensions should be used.

This natural jute twine comes in an 800-foot roll with a 2 mm, 3-ply construction. The listing identifies gardening among its intended uses. It can be stretched along proposed bed edges outdoors so dimensions and access conflicts can be checked against the measured plan before digging.
Check On AmazonIf you click this link and buy, we earn a commission at no additional cost to you.
Know what the drawing cannot tell you about soil, drainage, or microclimate
A measured plan can show where a low corner sits, but the drawing alone cannot prove that the corner stays wet, drains poorly, or has a soil problem. It can show the location of a wall, but it cannot tell you how much heat that wall stores or how strongly it changes nearby growing conditions. It can show a tree canopy outline, but the actual shade below that canopy can vary with season, sun angle, and foliage density. These are conditions to observe and verify in the garden, then record as notes rather than treating them as conclusions produced by the map.
This boundary matters because a precise drawing can create a false sense of certainty. Use the plan to organize observations, compare possible layouts, and keep measurements consistent, but let soil, drainage, light, and plant suitability be answered by the evidence appropriate to those questions. If a bed looks perfect on paper but sits in a persistently wet or deeply shaded spot, the geometry has not failed; it has simply reached the limit of what geometry can tell you. A good plan supports better decisions by showing where questions apply, not by pretending to answer every question itself.
Final thoughts: measure once, revise on the overlay
A finished base map should let you trace every important line or object back to a measurement, reference point, or clearly labeled field note. If something cannot be reconstructed from the information you recorded, check it again before using that area for detailed layout decisions. Keep the scale visible, retain the field sketch, and make revisions where the uncertain or proposed information lives rather than redrawing dependable measurements. The result is a working plan that can support later garden decisions without pretending to be more precise than the method allows.
Before acting on the drawing, verify the conditions the page cannot settle, including actual light, soil behavior, drainage, plant requirements, legal boundaries, and buried utilities when those issues matter. Use the map to locate those questions and organize what you observe, not to turn geometry into a diagnosis. The page does not need to become a professional drawing to be useful. It needs to represent the space clearly enough that the next decision can be checked against real dimensions and real site conditions.
FAQs
📏 How accurate does a garden plan need to be?
It should be accurate enough that fixed features, access points, and usable spaces land where you expect them to outdoors. Use repeatable reference points and consistent measurements, but do not treat a homeowner plan as proof of legal boundaries or buried utility locations.
🗺️ What is the easiest way to draw a garden plan to scale?
Measure the site first, choose one conversion that fits the longest dimension on the page, and apply that conversion to every line. Graph paper can make the transfer easier, but consistency matters more than the paper type.
🌳 How do I place a tree accurately on the plan?
Define the point you are locating, such as the trunk center, then measure to that point from two known fixed references. Transfer both distances to the scaled base map instead of placing the tree by eye.
🧭 Do I need to mark north on a garden plan?
Yes, it is useful because it keeps later site observations consistently oriented. It does not replace actual sun observations, since buildings, fences, trees, and seasonal canopy can change the light that reaches a planting area.
✏️ Should planting ideas go on the same sheet as the measurements?
Keep the measured base intact and put proposed beds or plant positions on a separate tracing or digital layer. That lets you revise the design without redrawing fixed boundaries and structures.
References and Sources
- RHS garden plan guidance: Supports the rough-sketch workflow, triangulation, offsets for curved boundaries, fixed-point measurements, and scale-plan methods used in this article.
- Gardenista garden plan guide: Supports the simple paper workflow and the use of a separate tracing layer for proposed planting changes.