A heat mat for seedlings is useful when the seed-starting medium is cooler than the germination range needed by the seeds you are starting. It is not automatic equipment for every tray, because different crops tolerate or prefer different germination temperatures and a warm room may already provide enough heat. The practical decision is to check the seed guidance, measure the medium rather than guessing from room temperature, control extra heat when needed, and change the setup after emergence. The goal is a warm germination zone only for as long as that warmth solves a real temperature problem.
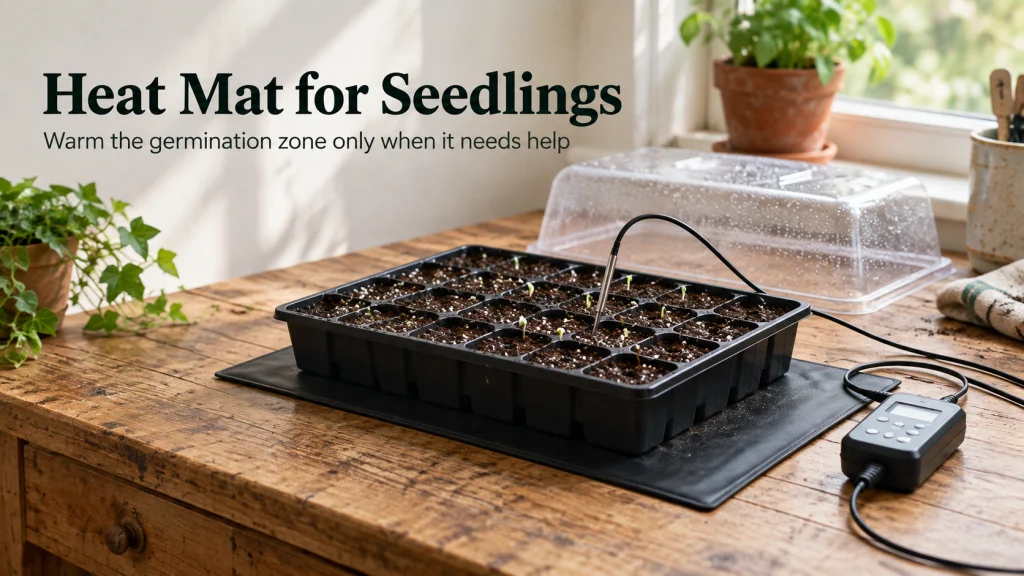
A cold tray can need help, while a warm tray may not
A heat mat for seedlings can solve a cold germination bench, but the same mat can become unnecessary once the tray is already warm enough or the seedlings have emerged. That is why I would start with the temperature problem, not with the equipment. A basement shelf, a bright room, and a tray under lights can all produce different medium temperatures even when the house thermostat looks similar. Before adding bottom heat, find out what the seeds need and what the tray is actually experiencing.
This keeps the setup simpler and makes the decision reversible. If you are still working out containers, media, light, and sowing workflow, the broader seed-starting process gives those pieces their proper order before extra equipment enters the picture. A mat should solve a measured constraint instead of becoming a permanent layer under every flat. Once that principle is clear, the rest of the decision is mostly checking temperature, stage, and control.

This seedling heat mat measures 10 by 20.75 inches and is made for germination and indoor gardening. The listing identifies it as waterproof and UL and MET certified. Its tray-sized format provides bottom heat when a seed-starting medium is measurably too cool.
Check On AmazonIf you click this link and buy, we earn a commission at no additional cost to you.
Check the seed temperature guidance first
Seeds do not all share one ideal germination temperature, so a single target for every tray is a poor starting point. University of California germination guidance shows meaningful differences among common vegetables, with cool-season and warm-season crops occupying different useful ranges. Read the seed packet or a reliable crop-specific source before deciding that a tray is too cool. The heat source comes after the biological requirement, not before it.
That distinction matters most when several crops share one seed-starting area. A tray of warm-season seeds may benefit from added bottom heat while another tray on the same shelf may already be within a suitable range without it. Do not average those needs into one universal setting just because the trays are physically close together. When the seed guidance differs, separate the trays or manage them independently rather than forcing every crop into the same thermal setup.
| Decision step | If yes | If no |
|---|---|---|
| Does reliable crop guidance show that the seeds need warmer germination conditions than your current setup provides? | Measure the seed-starting medium before deciding on equipment. | Skip the mat unless another crop-specific reason supports added heat. |
| Is the measured medium cooler than the suitable germination range for that crop? | First see whether a naturally warmer, stable location can close the gap. | Skip the mat because there is no measured temperature problem to solve. |
| Can a warmer location keep the medium in a suitable range without creating a new problem? | Use the simpler location change and keep monitoring the medium. | Controlled bottom heat becomes a reasonable option. |
| Will several crops with different temperature needs share the same heat zone? | Separate or regroup trays so one setting does not force every crop into the same condition. | Use one controlled setup only if the crops have compatible needs and the medium is actually too cool. |
Read the rows in order rather than as four independent tips. A heat mat earns a place only after crop guidance identifies a need, a medium measurement confirms a temperature gap, and a simpler location change does not solve that gap reliably. If any earlier step points to no added heat, stop there instead of continuing toward equipment by default. That branching logic turns the choice into a need-or-skip decision rather than a shopping checklist.

This kit includes five seed-starting trays with vented humidity domes and bases, totaling 200 cells. It is designed for seed starting, indoor gardening, and greenhouse use. Multiple separate trays make it practical to group crops with different germination temperature needs instead of forcing them into one shared heat zone.
Check On AmazonIf you click this link and buy, we earn a commission at no additional cost to you.
Compare room temperature with the temperature in the medium
Room temperature is useful context, but it is not the same measurement as the temperature around the seed. Extension guidance notes that the potting mix in indoor containers can differ from the surrounding air, so I would not use the wall thermostat as a substitute for checking the tray. Measure in the seed-starting medium where the roots and germinating seed are actually located. This is especially useful on shelves near windows, exterior walls, floors, vents, or lights that can create local temperature differences.
A probe thermometer gives you a more useful baseline than touching the tray or assuming that a room feels warm enough. Check the medium after the setup has had time to settle into its normal conditions, then compare that reading with the crop guidance. If the medium is already suitable, there is little reason to add heat simply because seed-starting kits are often pictured with a mat underneath. If the medium stays too cool, you now have a specific problem that bottom heat can address.

This soil thermometer uses an analog dial and a stainless steel 4-inch stem for seed germination and planting. Its scale measures from 20 to 180 degrees Fahrenheit and marks minimum, maximum, and optimal ranges. The probe format allows temperature checks directly in seed-starting medium instead of relying only on room temperature.
Check On AmazonIf you click this link and buy, we earn a commission at no additional cost to you.
Monitor setups that can overshoot
A seed-starting heat mat adds heat from below, but the final medium temperature also depends on the room, the tray, the growing medium, covers, nearby lighting, and how the setup sheds heat. That means a setup that works in a cool room may run warmer when the room temperature rises or when another heat source is added nearby. Utah State University Extension recommends pairing heat mats with a thermostat when added heat is needed so containers do not become too hot. The important point is control based on the medium, not blind trust in a mat simply because it is marketed for seedlings.
Check the tray again after the mat has been operating under normal conditions. If you use a thermostat, place and use its sensor according to the exact instructions for that device so the reading represents the location the controller is meant to regulate. Do not assume that a dial number, controller display, or room reading guarantees the same temperature everywhere in the tray. A quick recheck after setup changes, such as adding a cover or moving the tray, can catch a condition that has shifted from helpful warmth to unnecessary heat.

This digital thermostat controller is rated for a 40 to 108 degree Fahrenheit control range and up to 1000 watts. The listing identifies it for seedlings, germination, incubation, and fermentation. It can regulate a compatible heat source so added bottom heat is controlled rather than left running without a temperature set point.
Check On AmazonIf you click this link and buy, we earn a commission at no additional cost to you.
Follow the exact wet-area and thermostat instructions for the device
Seed starting combines electricity, watering, damp trays, cords, and repeated handling, so the device instructions matter as much as the horticultural decision. Use only a heat mat and controller in the way their current instructions allow, including placement, supported tray arrangement, sensor position, cord routing, and exposure to moisture. Do not copy a setup from a photo when the exact device manual gives different directions. Product-specific electrical and moisture limits cannot be safely inferred from the fact that two mats look similar.
The same rule applies to thermostat setup. A controller can improve temperature control, but only when the probe, set point, and connected load are used within the instructions for that controller and mat. If the manual is missing or unclear about the way you intend to use the equipment around watering, stop and resolve that question before operating it. Horticultural guidance can explain why controlled bottom heat may help germination, but the manufacturer documentation controls how that exact electrical device is connected and used.

This combo pairs a 10 by 20.75-inch seedling heat mat with a thermostat controller. The selected variant is the 10 x 20.75 heat mat with thermostat, and the listing identifies the set as ETL listed for seed starting and germination. The included controller provides temperature control for the supplied seedling heat mat.
Check On AmazonIf you click this link and buy, we earn a commission at no additional cost to you.
Separate germination warmth from seedling growing temperature
The temperature that helps a seed germinate is not automatically the temperature you should maintain after the seedling is up. Iowa State University Extension explains that the preferred growing temperature after germination is generally cooler than the optimum germination temperature. University of Maryland guidance also moves emerged seedlings into somewhat cooler conditions after germination. Treat emergence as a stage change that triggers a new temperature decision rather than as proof that the original heat setting should continue.
This stage distinction matters because germination and seedling growth are different biological jobs. Once shoots are up, light, moisture, airflow, and crop-appropriate growing temperature become the more useful frame for judging the environment. The point of this section is not to tell you exactly when to unplug a device, but to establish that the germination target should not automatically become the growing target. If you want the broader reasoning behind propagation stages beyond this one equipment decision, the site guide to plant propagation methods and stages provides that wider context.
| Stage | Temperature decision | Practical action |
|---|---|---|
| Before germination | Compare crop guidance with measured medium temperature. | Add controlled bottom heat only if the medium is too cool. |
| During emergence | Watch for the tray moving from seed requirements to seedling requirements. | Check frequently so emerged seedlings are not left on unnecessary heat by default. |
| After emergence | Reassess temperature together with light, moisture, and airflow. | Remove or reduce bottom heat unless current crop guidance and measured conditions still justify it. |
The useful timeline is therefore based on plant stage, not on a fixed number of days. That keeps the heat decision tied to what the tray is doing rather than to a calendar rule. A late cell in a mixed tray can complicate the transition, but that is a tray-management problem, not a reason to keep every emerged seedling warm indefinitely. When possible, grouping crops with similar germination behavior makes the transition easier to manage.
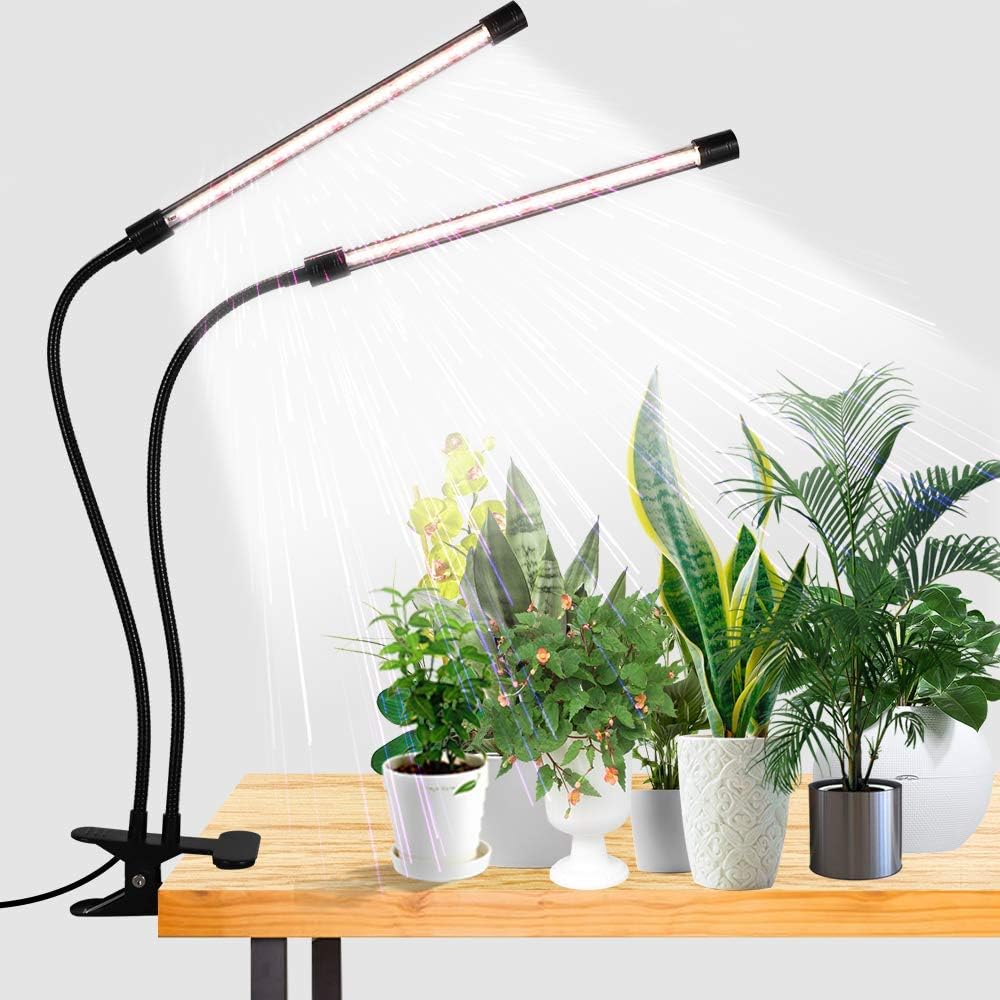
This indoor grow light uses a 6000K full-spectrum lamp with white and red LEDs. It has a flexible gooseneck clamp, adjustable brightness, and automatic 4-, 8-, and 12-hour timer settings. Those light controls are useful after emergence when seedling management shifts beyond germination temperature alone.
Check On AmazonIf you click this link and buy, we earn a commission at no additional cost to you.
Remove or reduce heat when the stage no longer needs it
Use emergence as the trigger for a practical equipment check. Measure the medium again under the normal post-emergence setup, compare that reading with crop-appropriate growing guidance, and then decide whether the mat should be removed, reduced, or temporarily retained. If the surrounding conditions now keep the tray where it needs to be, move the tray off the mat or reduce controlled heat according to the plant requirement and the equipment instructions. The mat has finished its job when the measured temperature gap it was solving has ended.
Mixed emergence is where the workflow becomes less tidy. If only part of a tray has emerged, check whether the remaining cells can be separated or regrouped so the emerged seedlings do not have to share the same heat decision as slower seeds. I would avoid keeping an entire tray on extra heat solely to chase a few late cells when the rest of the seedlings no longer need that condition. Because a mat is easy to remove or reduce, treat that reversibility as part of the setup instead of designing the tray around permanent bottom heat.

This single seedling heat mat measures 10 by 20.75 inches and is intended for seed starting and germination. The listing describes it as waterproof and ETL listed for indoor growing, hydroponic, and greenhouse use. Its one-mat format can be removed from a tray when bottom heat is no longer needed.
Check On AmazonIf you click this link and buy, we earn a commission at no additional cost to you.
Skip the mat when ambient conditions already fit
A heat mat is optional when the seed-starting medium already stays within a suitable range for the seeds you are sowing. Iowa State Extension explicitly notes that warm locations in the home can provide suitable germination temperatures and that electric mats are useful in cool environments. That means the correct answer can be to buy nothing and simply use the stable conditions you already have. A mat does not improve a temperature that is already appropriate merely by making the setup more elaborate.
Skipping extra heat also removes one control task from the seed-starting routine. There is no thermostat to set, no extra cord to manage, and no additional heat source changing how quickly a small tray may dry. I would still measure the medium rather than assume that a warm room guarantees a warm tray, especially on a cool floor or near an exterior surface. Once the measurement shows that conditions fit the seed guidance, leaving the tray alone is a valid, evidence-based choice.

This digital 4-in-1 meter measures soil temperature, moisture, pH, and sunlight intensity. A backlit LCD displays the readings for gardening and outdoor plant use. Its soil-temperature function provides a direct check of the medium when deciding whether ambient conditions already make extra bottom heat unnecessary.
Check On AmazonIf you click this link and buy, we earn a commission at no additional cost to you.
Final Thoughts: use bottom heat only while it solves a measured problem
A useful heat-mat decision starts with three checks: what temperature the seed needs for germination, what temperature the medium actually has, and what stage the plant is in now. If the medium is too cool for the seed, controlled bottom heat can be a practical way to close that gap. If the medium already fits, the mat is optional rather than automatically beneficial. When emergence changes the plant’s needs, reassess instead of carrying the germination setup forward by habit.
That approach keeps a simple tool in its proper role. Measure first, add only the heat the germination stage needs, follow the exact electrical and thermostat instructions for the equipment, and remove or reduce the heat when the reason for using it disappears. The goal is not the warmest tray or the most complete-looking seed station. The goal is a seed-starting environment that matches the crop closely enough without adding work or heat that no longer serves the plant.

This package includes two 10 by 20.75-inch seedling heat mats for seed starting and germination. The listing describes the mats as waterproof and ETL listed for indoor growing, hydroponic, and greenhouse use. Two separate mats can support independently managed trays when more than one germination zone actually needs bottom heat.
Check On AmazonIf you click this link and buy, we earn a commission at no additional cost to you.
FAQs
🌱 Do I need a heat mat to start seeds indoors?
Not automatically. Use one when the measured seed-starting medium is cooler than the germination conditions recommended for the crop and a simpler warm location does not solve the problem reliably.
🌡️ Should I measure the room or the seed-starting mix?
Measure the growing medium because that is the temperature the germinating seed is experiencing. Room temperature is useful context, but it can differ from the temperature inside the tray.
🔥 Can a seedling heat mat make the tray too warm?
Yes, depending on the room, tray setup, covers, nearby lights, and how the mat is controlled. Monitor the medium and use a compatible thermostat according to the device instructions when temperature control is needed.
💡 When should I remove seedlings from bottom heat?
Reassess as seedlings emerge because growing seedlings often need cooler conditions than germinating seeds. Remove or reduce bottom heat when the crop guidance and measured conditions no longer justify it.
🪴 Can different seed trays need different heat settings?
Yes. Different crops can have different germination temperature needs, so separate trays when one crop needs extra warmth and another does not.
References and Sources
- UC Master Gardener Program: Supports crop-specific germination temperature differences and the use of medium temperature measurements.
- Iowa State University Extension and Outreach: Supports the distinction between germination temperature and cooler growing conditions after emergence.
- Utah State University Extension: Supports conditional heat-mat use for cool setups and thermostat control to avoid excessive tray temperatures.
- University of Maryland Extension: Supports using added warmth to speed germination and shifting seedlings to cooler conditions after germination.