Garden tool maintenance works better when cleaning, disinfection, sharpening, rust control, handle care, and storage are treated as separate jobs instead of one end-of-season ritual. A tool can be clean but still need disinfection, sharp but still have damaging rust, or dry but poorly supported in storage. The practical sequence is to identify the problem first, do only the maintenance that problem requires, and stop when damage moves beyond safe homeowner care. That approach keeps ordinary hand tools useful without turning routine upkeep into unnecessary repair work.
Start by naming the maintenance job
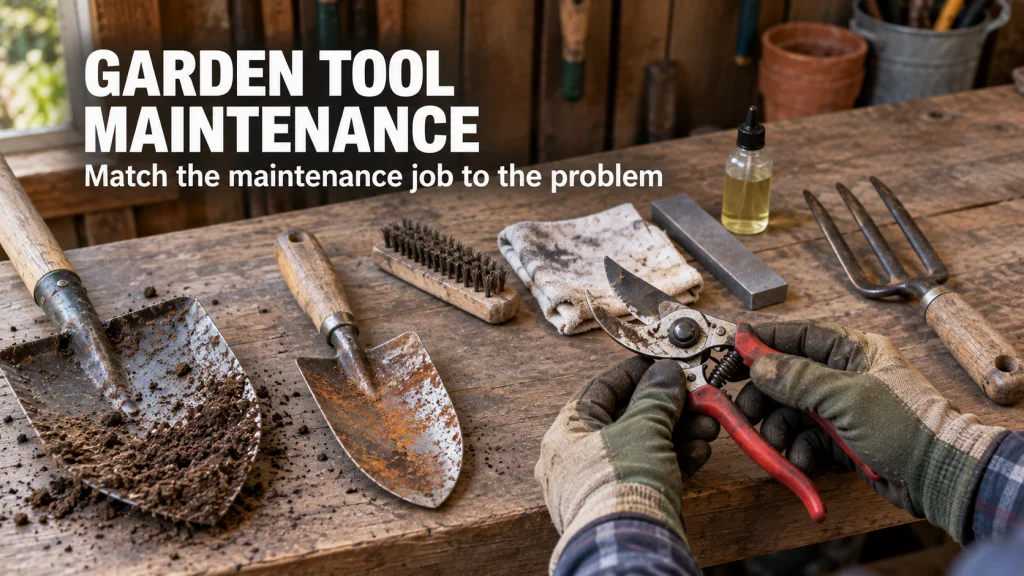
Put one soil-caked shovel, one rusty trowel, one dull pair of pruners, and one blade that just cut visibly diseased plant tissue side by side. They do not have the same problem, even though all four need some form of garden tool maintenance. The shovel mainly needs cleaning, the rusty trowel needs corrosion control, the pruners may need sharpening, and the disease-exposed blade calls for disinfection after debris is removed. Treating all four with one routine wastes effort and can make the wrong problem worse.
I would start with inspection before reaching for a file, oil, disinfectant, or replacement handle. Look for soil, sap, surface rust, deep pitting, loose pivots, bent metal, chips, cracks, splinters, and moisture around sockets or joints. That quick check tells you whether the job is basic care or whether the tool has crossed into repair or service territory. For a broader look at which ordinary tools belong in a homeowner setup, the essential garden tools guide provides the larger selection context.
| What you see | Primary maintenance job | What to check next |
|---|---|---|
| Soil, sap, or plant residue | Cleaning | Dryness, rust, pivots, and edge condition |
| Known disease exposure | Cleaning, then disinfection | Disinfectant label, material compatibility, and drying |
| Rounded or folded cutting edge | Sharpening | Original bevel, chips, cracks, and blade alignment |
| Orange film or rough corrosion | Rust control | Whether damage is superficial or deeply pitted |
| Rough or loose wooden handle | Handle care | Cracks, socket condition, and secure attachment |
| Clean tool left damp or on the floor | Storage correction | Ventilation, support, and moisture exposure |
The point of the selector is not to create extra chores. It keeps each action tied to a visible condition so a clean tool is not sharpened without reason and a dull tool is not mistaken for a sanitation problem. Once the problem is named, the order of work becomes much easier to control.

OXO Good Grips Deep Clean Brush Set includes a large brush and a small brush with a wiper blade. Durable nylon bristles help scrub built-up debris, while soft non-slip grips improve control. The two brush sizes suit detailed cleaning on exposed tool surfaces and tight areas before inspection, drying, or other maintenance.
Check On AmazonIf you click this link and buy, we earn a commission at no additional cost to you.
Separate cleaning from disinfection
Cleaning removes soil, sap, plant residue, grit, and other material that interferes with tool movement and inspection. Disinfection addresses disease transmission risk, so it is a different job with a different reason for doing it. A blade covered with sap is not automatically disinfected because it looks shiny after wiping, and a disinfectant should not be expected to work well through a layer of debris. For ordinary care, remove visible material first, then decide whether disease exposure makes disinfection necessary.
That decision is most relevant for cutting tools moving among plants when disease is suspected or known. Use a disinfectant method that is appropriate for the tool material and follow the product label or authoritative horticultural guidance rather than inventing a stronger mixture. Some disinfectants can corrode metal, so more chemical is not automatically better for a sharp cutting edge. After treatment, let the tool dry fully before lubrication or storage.
| Stage | Purpose | Practical check |
|---|---|---|
| Remove debris | Expose the actual surface | No packed soil, sap, or plant residue remains on the working area |
| Inspect | Find damage before the next step | Check edges, joints, rust, and cracks while the tool is clean |
| Disinfect when needed | Reduce disease transmission risk | Use a suitable method and follow its label or authoritative directions |
| Dry | Limit corrosion and prepare for storage | No trapped moisture remains around joints, sockets, or blades |
| Protect and store | Maintain motion and reduce new corrosion | Light protection where appropriate and a dry storage location |
This sequence matters because cleaning and disinfection solve different problems. If there is no meaningful disease exposure, routine cleaning and drying may be all the tool needs before inspection and storage. If there is disease exposure, adding the disinfection step is a targeted response rather than a ritual applied to every garden tool.

Clorox Disinfecting Wipes are bleach-free wipes in a 75-count canister for disinfecting hard, nonporous surfaces according to the label. The premoistened format avoids mixing a homemade disinfectant solution. For garden tools, remove visible debris first and use the wipes only on material-compatible surfaces as directed, then let the tool dry fully.
Check On AmazonIf you click this link and buy, we earn a commission at no additional cost to you.
Inspect before sharpening
A dull edge is only one reason a cutting tool may perform badly. Loose pivots, bent blades, heavy rust, chips, misalignment, or a cracked handle can make a tool feel dull even when filing the edge will not solve the underlying problem. Clean the tool first, open and close moving parts slowly, and look along the cutting edge under good light. If the blades wobble, bind, cross incorrectly, or show structural damage, fix the appropriate simple adjustment only if the tool design clearly allows it.
Sharpening is reasonable when the edge is intact but rounded, folded, or no longer cutting cleanly. It is not a way to erase deep chips, rebuild missing metal, straighten badly bent parts, or compensate for a loose head. Serrated edges and specialty profiles can require equipment or technique beyond routine homeowner work, and power equipment belongs under its current manual rather than a generic hand-tool procedure. The safest decision is often to stop before a small maintenance job becomes an improvised repair.
- Clean enough to see the full edge and joint.
- Check for cracks, chips, deep pitting, bent metal, and loose attachments.
- Confirm that the tool still opens, closes, or seats as designed.
- Sharpen only an edge that remains structurally sound.
- Use service or replacement when damage changes the tool’s geometry or secure attachment.
A good inspection also prevents unnecessary metal removal. If the real issue is dried sap at a pivot or a loose fastener, filing the blade will not make the mechanism behave properly. Sharpening should follow diagnosis of the tool condition, not substitute for it.
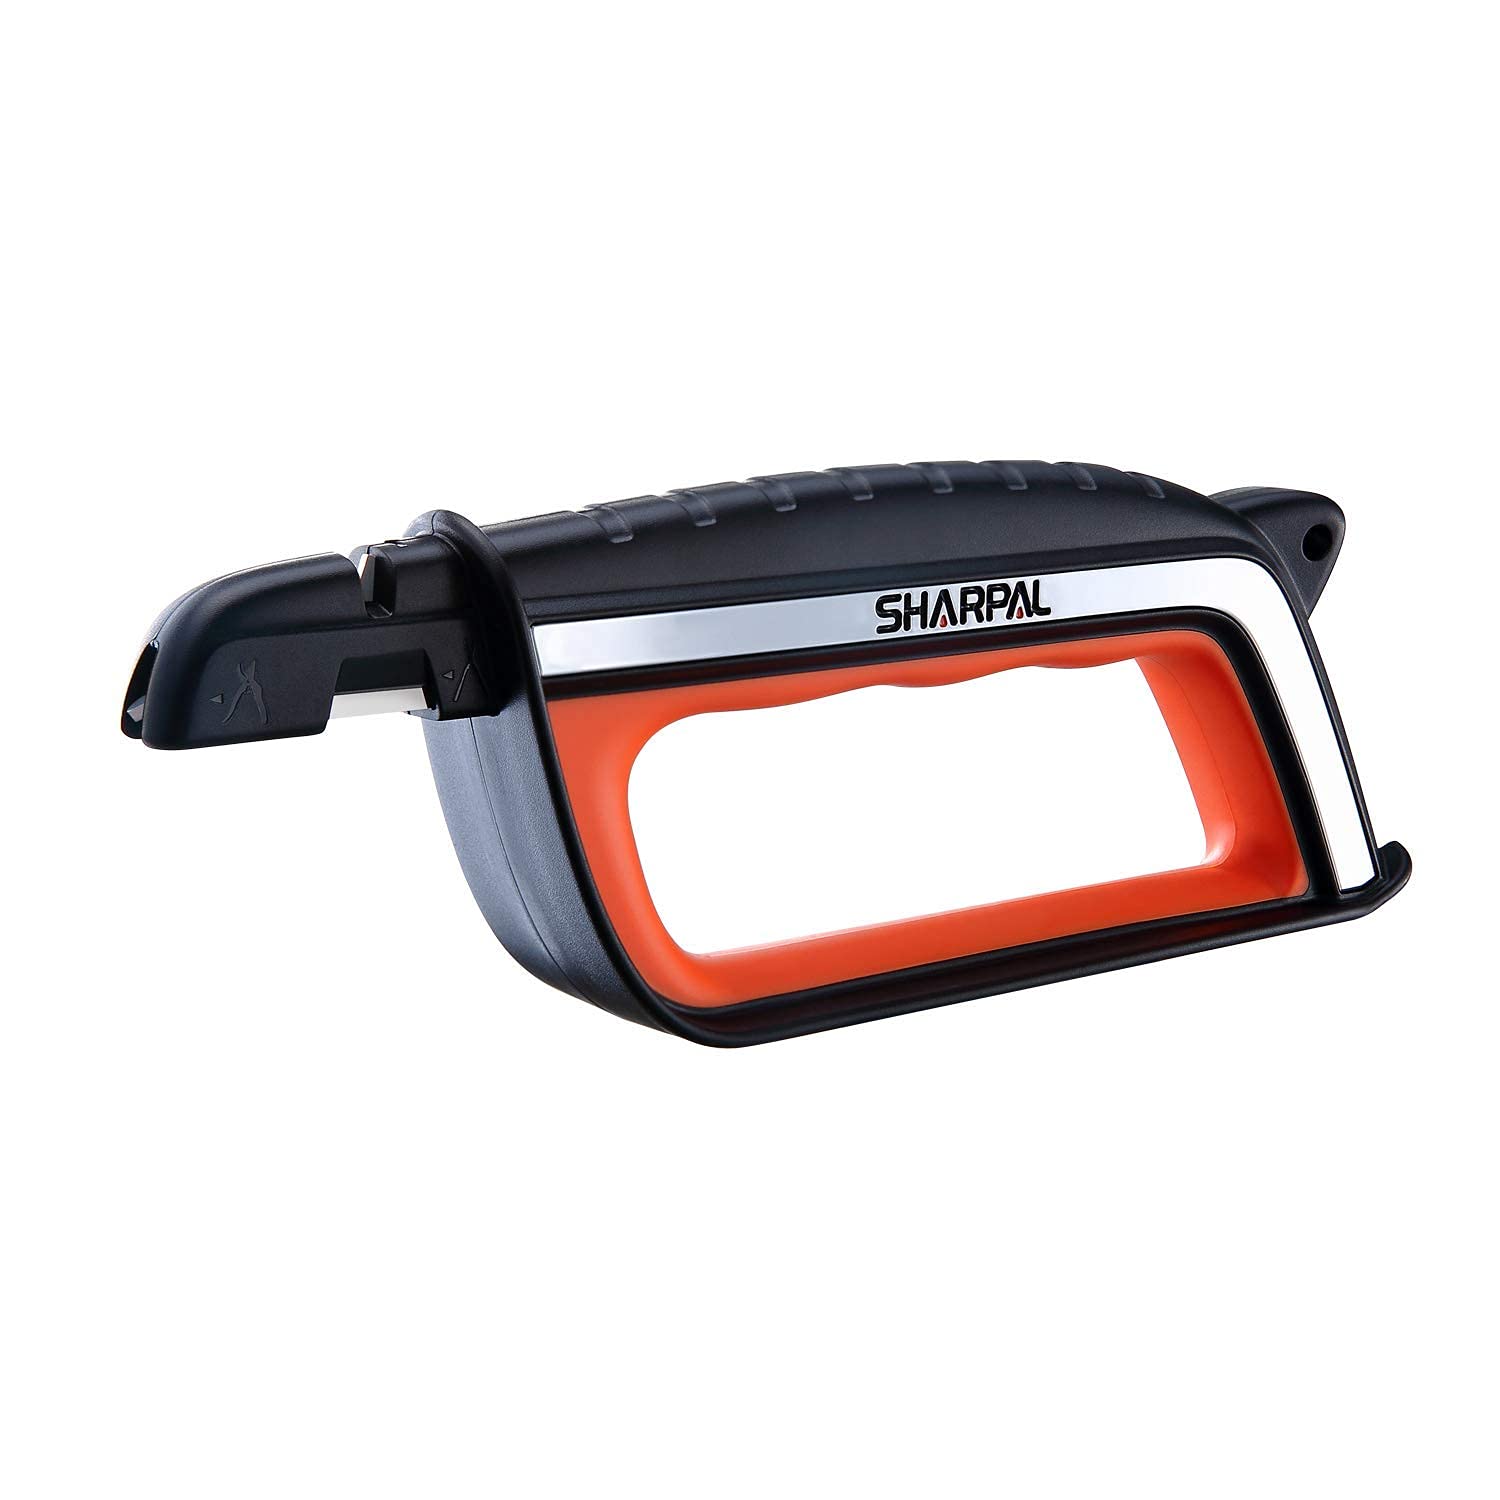
SHARPAL 103N combines tungsten carbide and ceramic sharpening surfaces in one handheld tool. It is designed for straight edges and common garden tools including pruners, hedge shears, mower blades, axes, and machetes. Use it only after inspection confirms the edge is structurally sound and appropriate for the sharpener.
Check On AmazonIf you click this link and buy, we earn a commission at no additional cost to you.
Preserve the original edge geometry
Most homeowner sharpening mistakes start with trying to create a new edge instead of restoring the one the tool already has. The existing bevel is the reference, because different tools are shaped for different cutting actions and load paths. Keep the file or stone aligned with that original face, remove only enough metal to restore a useful edge, and avoid grinding both sides just because both are visible. On bypass pruners and similar tools, changing the intended blade relationship can create rubbing, gaps, or poor cuts.
I would also avoid universal angle claims unless the manufacturer or a reliable technical source gives one for that exact tool design. A shovel, hoe, hedge shear, lopper, and pruning shear do not need one imaginary magic bevel. What matters for routine care is preserving the existing geometry, keeping the tool stable while working, and checking the edge frequently so you do not remove more material than necessary. If you cannot identify the intended edge or the blade is badly damaged, that uncertainty is a good stop point.
Key point: Sharpening should restore a sound working edge, not redesign the blade. Follow the existing bevel and the tool maker’s instructions when the geometry is not obvious.
After sharpening, remove loose filings, wipe the surface clean, and check the cutting action before putting the tool away. A light protective treatment may be appropriate for exposed metal, but it should not leave the handle or working surface slippery during use. The finished tool should feel controlled and aligned, not merely sharper to the fingertip.

FELCO 905 uses two tungsten carbide sharpening surfaces for coarse and fine edge work. Built-in 7 mm and 8 mm hex sockets add adjustment capability for compatible pruning tools. Its compact format suits controlled touch-ups where the existing blade geometry is known and the tool remains structurally sound.
Check On AmazonIf you click this link and buy, we earn a commission at no additional cost to you.
Treat rust by severity
A light orange film on a shovel is different from deep pitting along a pruner blade or corrosion hidden inside a socket. Surface rust can often be removed with mild abrasion after the tool is cleaned, followed by thorough drying and a light protective film on appropriate metal surfaces. The goal is to remove active corrosion without grinding away sound metal. Once rust has created deep pits, weakened thin sections, or affected alignment, appearance is no longer the main concern.
Severity also changes how aggressively you should work. Fine abrasive material may be enough for a haze, while more persistent surface corrosion may call for a longer cleaning process supported by trusted guidance for the material. Avoid assuming that an acid soak, wire wheel, or heavy grinding method is harmless to every blade, coating, spring, or plated surface. If a cutting edge is deeply pitted or a load-bearing part has lost material, replacement or qualified service can be more sensible than trying to polish the damage away.
| Rust condition | Homeowner response | Stop condition |
|---|---|---|
| Light surface film | Clean, use mild abrasion, dry, and protect | Rust returns immediately because storage remains damp |
| Moderate surface corrosion | Use a controlled rust-removal method suitable for the material | Coating, edge shape, or moving parts may be damaged by the method |
| Deep pitting on a cutting edge | Inspect for loss of usable edge and alignment | Edge cannot be restored without major metal removal |
| Corrosion at socket or structural joint | Clean enough to inspect attachment and metal condition | Head, tang, fastener, or socket no longer feels secure |
Rust treatment is incomplete if the same damp storage condition remains. Once the metal is clean and dry, correct the moisture exposure that caused the problem, especially wet floors, outdoor storage, or tools put away with soil packed around joints. Prevention is usually easier on the tool than repeated aggressive rust removal.

Lodge Rust Eraser is a compact abrasive block made for removing surface rust and tarnish. Lodge states that it can be used on knives, tools, and grill grates as well as cast iron cookware. It fits mild-corrosion cleanup where the goal is controlled surface rust removal rather than grinding away deeply pitted metal.
Check On AmazonIf you click this link and buy, we earn a commission at no additional cost to you.
Store tools dry and supported
Storage problems often begin in places that look harmless, especially a damp floor, a crowded corner, or a joint that never gets enough air to dry. Check pivots, sockets, blade overlaps, and the base of metal heads before putting a tool away because moisture can linger there after exposed surfaces look dry. The goal is not a spotless display, but a storage setup that stops water, grit, and contact damage from accumulating between uses. A dry-looking handle still does not prove the joint beneath it is protected.
The storage location should keep tools out of direct weather and away from persistent floor moisture. Hanging long-handled tools or placing them in a stable rack can keep metal heads from resting on damp concrete or soil, while smaller cutting tools should be closed or secured so the edge is not exposed. Good storage also reduces impact damage from tools piled against one another. If the shed itself stays humid or leaks, reorganizing the tools without fixing the moisture problem will not solve recurring corrosion.
Practical tip: Give each tool a storage position that keeps metal off damp surfaces, protects exposed edges, and prevents heavier tools from leaning on lighter ones.
That routine does not need to become a long cleaning session after every small task. The useful habit is simply to avoid putting wet, dirty tools into a closed or damp space and forgetting them there. Seasonal maintenance is easier when daily storage has not created a layer of preventable damage.

StoreYourBoard Bedrock Garden Tool Organizer is a wall-mounted steel rack for long-handled yard tools. Four rubber-coated hooks provide separate hanging positions for rakes, shovels, and similar equipment. Wall storage helps keep tool heads supported and off damp floor surfaces between uses.
Check On AmazonIf you click this link and buy, we earn a commission at no additional cost to you.
Repair simple handles only when the head and socket remain sound
Wooden handles need a different inspection from blades and metal heads. Rough grain and small splinters may be smoothed carefully, while a dry handle may benefit from a suitable finish used according to its directions. A cracked handle, loose head, damaged socket, or questionable fastener is a structural problem rather than a cosmetic one. The repair decision should begin with whether the tool head can still be attached securely and predictably.
Simple homeowner work makes sense when the replacement process is clear, the tool was designed for a replaceable handle, and the head or socket is not distorted or badly corroded. Stop when the head is cracked, the socket is badly damaged, the attachment method is unclear, or the repair would require improvised welding, machining, or other work beyond ordinary hand-tool care. Powered equipment adds another boundary because guards, electrical systems, fuel systems, and internal mechanisms should follow the current manual or qualified service guidance. Saving a handle is useful only if the finished tool is secure enough to use normally.
| Condition | Reasonable owner care | Service or replacement boundary |
|---|---|---|
| Minor roughness or splinters | Smooth carefully and refinish as appropriate | Crack extends through the handle or near the head |
| Replaceable wooden handle, sound socket | Follow the tool’s normal replacement method | Socket is cracked, badly corroded, or misshapen |
| Loose simple fastener on a hand tool | Tighten only when the correct attachment is obvious | Fastener, tang, or head no longer seats securely |
| Powered equipment | External cleaning and manual-directed owner maintenance | Internal repair, unsafe electrical work, or engine service |
The boundary table is intentionally conservative. A garden tool does not become a better bargain because a questionable structural repair keeps it in service one more season. If the handle and head cannot be made secure with a straightforward, documented method, the right maintenance decision is to stop.

3M 9000NA-20 Sandpaper includes five 9 x 11-inch sheets of 220-grit aluminum oxide abrasive. It is intended for general-purpose sanding on wood, metal, and painted surfaces. For a sound wooden garden-tool handle, the fine grit can help smooth minor roughness or small splinters without treating cracks or loose attachments as cosmetic damage.
Check On AmazonIf you click this link and buy, we earn a commission at no additional cost to you.
Final Thoughts: Treat each maintenance problem as its own job
Good tool care is less about completing a universal checklist and more about making the next decision from the condition in front of you. The useful question is whether the problem is surface contamination, edge wear, corrosion, a storage issue, or structural damage that changes what safe owner care can accomplish. That condition-first approach limits unnecessary filing, chemical use, and improvised repair while making it easier to recognize when simple maintenance is enough. It also keeps routine upkeep proportional to the tool instead of turning every problem into a full restoration project.
The practical finish line is not making an old tool look new. It is restoring predictable function while preserving sound metal, secure attachments, and the geometry the tool was designed to use. When the procedure becomes model-specific, structural, electrical, or dependent on damage you cannot evaluate confidently, the better maintenance decision is to stop and follow the current manual or move to qualified service or replacement. That boundary is what keeps ordinary garden-tool care useful, repeatable, and appropriate for a homeowner.

3-IN-ONE 10038 Multi-Purpose Oil uses a drip applicator for controlled placement. The oil is marketed for reducing friction, quieting squeaks, and helping protect metal from corrosion. A small amount can fit post-cleaning maintenance on pivots and appropriate exposed metal without turning routine care into a heavy coating.
Check On AmazonIf you click this link and buy, we earn a commission at no additional cost to you.
Explore tool care by maintenance job
Once you know which maintenance job is in front of you, use the focused guide that matches the condition rather than repeating a full routine. These pages separate cleaning, sharpening, corrosion control, disinfection, storage, and handle replacement so each job can stay within its proper scope. That separation is especially useful when two problems appear on the same tool, such as rust on a blade that is also dull. Handle the condition that affects inspection first, then move to the next job only if it is still needed.
| Topic | What you’ll find |
|---|---|
| Cleaning garden tools | A focused routine for removing soil, sap, and residue before inspection or storage. |
| Sharpening garden tools | How to decide whether an edge needs sharpening and where homeowner sharpening should stop. |
| Sharpening pruning shears | Edge, bevel, alignment, and stop conditions specific to pruning shears. |
| Sharpening loppers | How lopper blade condition, leverage, and alignment affect a sharpening decision. |
| Sharpening hedge shears | Care for long paired blades without treating them like a single beveled digging edge. |
| Removing rust from garden tools | How to match rust removal to surface corrosion, deeper damage, and prevention. |
| Disinfecting garden tools | When disease exposure changes the cleaning routine and how to keep disinfection separate from basic washing. |
| Garden tool storage | How moisture, support, organization, and edge protection affect tools between uses. |
| Replacing garden tool handles | How to judge a simple handle replacement against socket, head, and attachment condition. |
Choose the page that matches the actual failure you found during inspection. Start with the most immediate condition rather than trying to perform every procedure at once. That keeps routine upkeep focused and makes it easier to recognize when the safer answer is service or replacement rather than another maintenance step. It also gives each task enough room for the tool-specific details that do not belong in a broad maintenance overview.

Corona AC 8300 is a compact handheld sharpener with a 5-inch carbide file and non-slip grip. It is designed to sharpen straight edges and common garden cutting tools such as pruners and shears. As a focused sharpener, it matches the section's routing approach by supporting one specific maintenance job after inspection.
Check On AmazonIf you click this link and buy, we earn a commission at no additional cost to you.
FAQs
🧽 Do I need to clean garden tools after every use?
Remove soil, sap, and moisture often enough that they do not harden, trap grit, or create corrosion before the next use. A quick wipe and dry may be enough after a light job, while muddy or sap-covered tools need a more thorough cleaning.
🦠 Is cleaning the same as disinfecting pruning tools?
No. Cleaning removes debris, while disinfection is an additional step used when disease transmission is a concern. Clean first, then use an appropriate disinfectant method according to its label or authoritative horticultural guidance.
✂️ How do I know when a garden tool needs sharpening?
Look for a rounded or folded edge, increased cutting effort, or a tool that no longer cuts cleanly after it has been cleaned and adjusted. Do not sharpen past deep chips, cracks, heavy pitting, or badly altered blade geometry.
🧰 Should I use the same sharpening angle on every tool?
No. Preserve the existing bevel unless the manufacturer or a reliable technical source specifies the geometry for that tool. Universal angle advice can remove too much metal or change how paired blades meet.
🟠 Can a rusty garden tool still be saved?
Light surface rust is often a maintenance problem, while deep pitting or corrosion at a structural joint can be a service or replacement problem. Clean enough to inspect the metal before deciding how aggressive rust removal should be.
🏠 Is a garage always dry enough for garden tool storage?
Not necessarily. Check whether tools sit on damp concrete, receive wind-driven rain, or stay wet around sockets and joints. The useful storage condition is dry, sheltered, and supportive, regardless of the room’s name.
🪵 When should I replace a wooden tool handle instead of sanding it?
Minor roughness and small splinters may be smoothed, but a cracked handle or insecure head needs a structural decision. Replace the handle only when the tool head and socket remain sound and the attachment method is clear.
⚙️ Can I use the same maintenance routine on powered garden equipment?
No. External cleaning and basic owner maintenance should follow the current manual for that equipment. Internal engine, electrical, guard, or other safety-critical repair is outside a generic hand-tool routine.
References and Sources
- University of Minnesota Extension: Supports the distinction between cleaning and disinfection, tool drying, and material-aware disinfection practices.
- UC Master Gardeners of San Diego County: Supports inspection, cleaning, sharpening, sanitizing, lubrication, and dry storage for ordinary garden tools.
- Penn State Extension: Supports keeping pruning tools clean and dry, disinfecting when disease exposure is relevant, and maintaining sharp cutting edges.